")


")


")


Sometimes I wonder if there is anything left to teach after hosting workshops, coaching and online resources for over 4 years now. Are there really MORE areas of the wedding day that photographers need help with? The answer is YES. I could break down the wedding day piece by piece and really never run out of advice to share! Over the years I have established patterns in the way that I photograph wedding days. It used to be that I only held myself accountable to getting AWESOME portraits at every wedding.
It’s almost like I didn’t think that it was possible to get crazy amazing shots during other parts of the day like during toasts or when the bride gets into her dress. I KNEW how to capture amazing portraits and I knew how to push myself during those parts of the day but when it came to other areas, I didn’t challenge myself for the longest time! Now I know that all of that was a lie. I CAN be creative when the bride gets into her dress and I CAN try knew things during all different parts of the wedding day!!
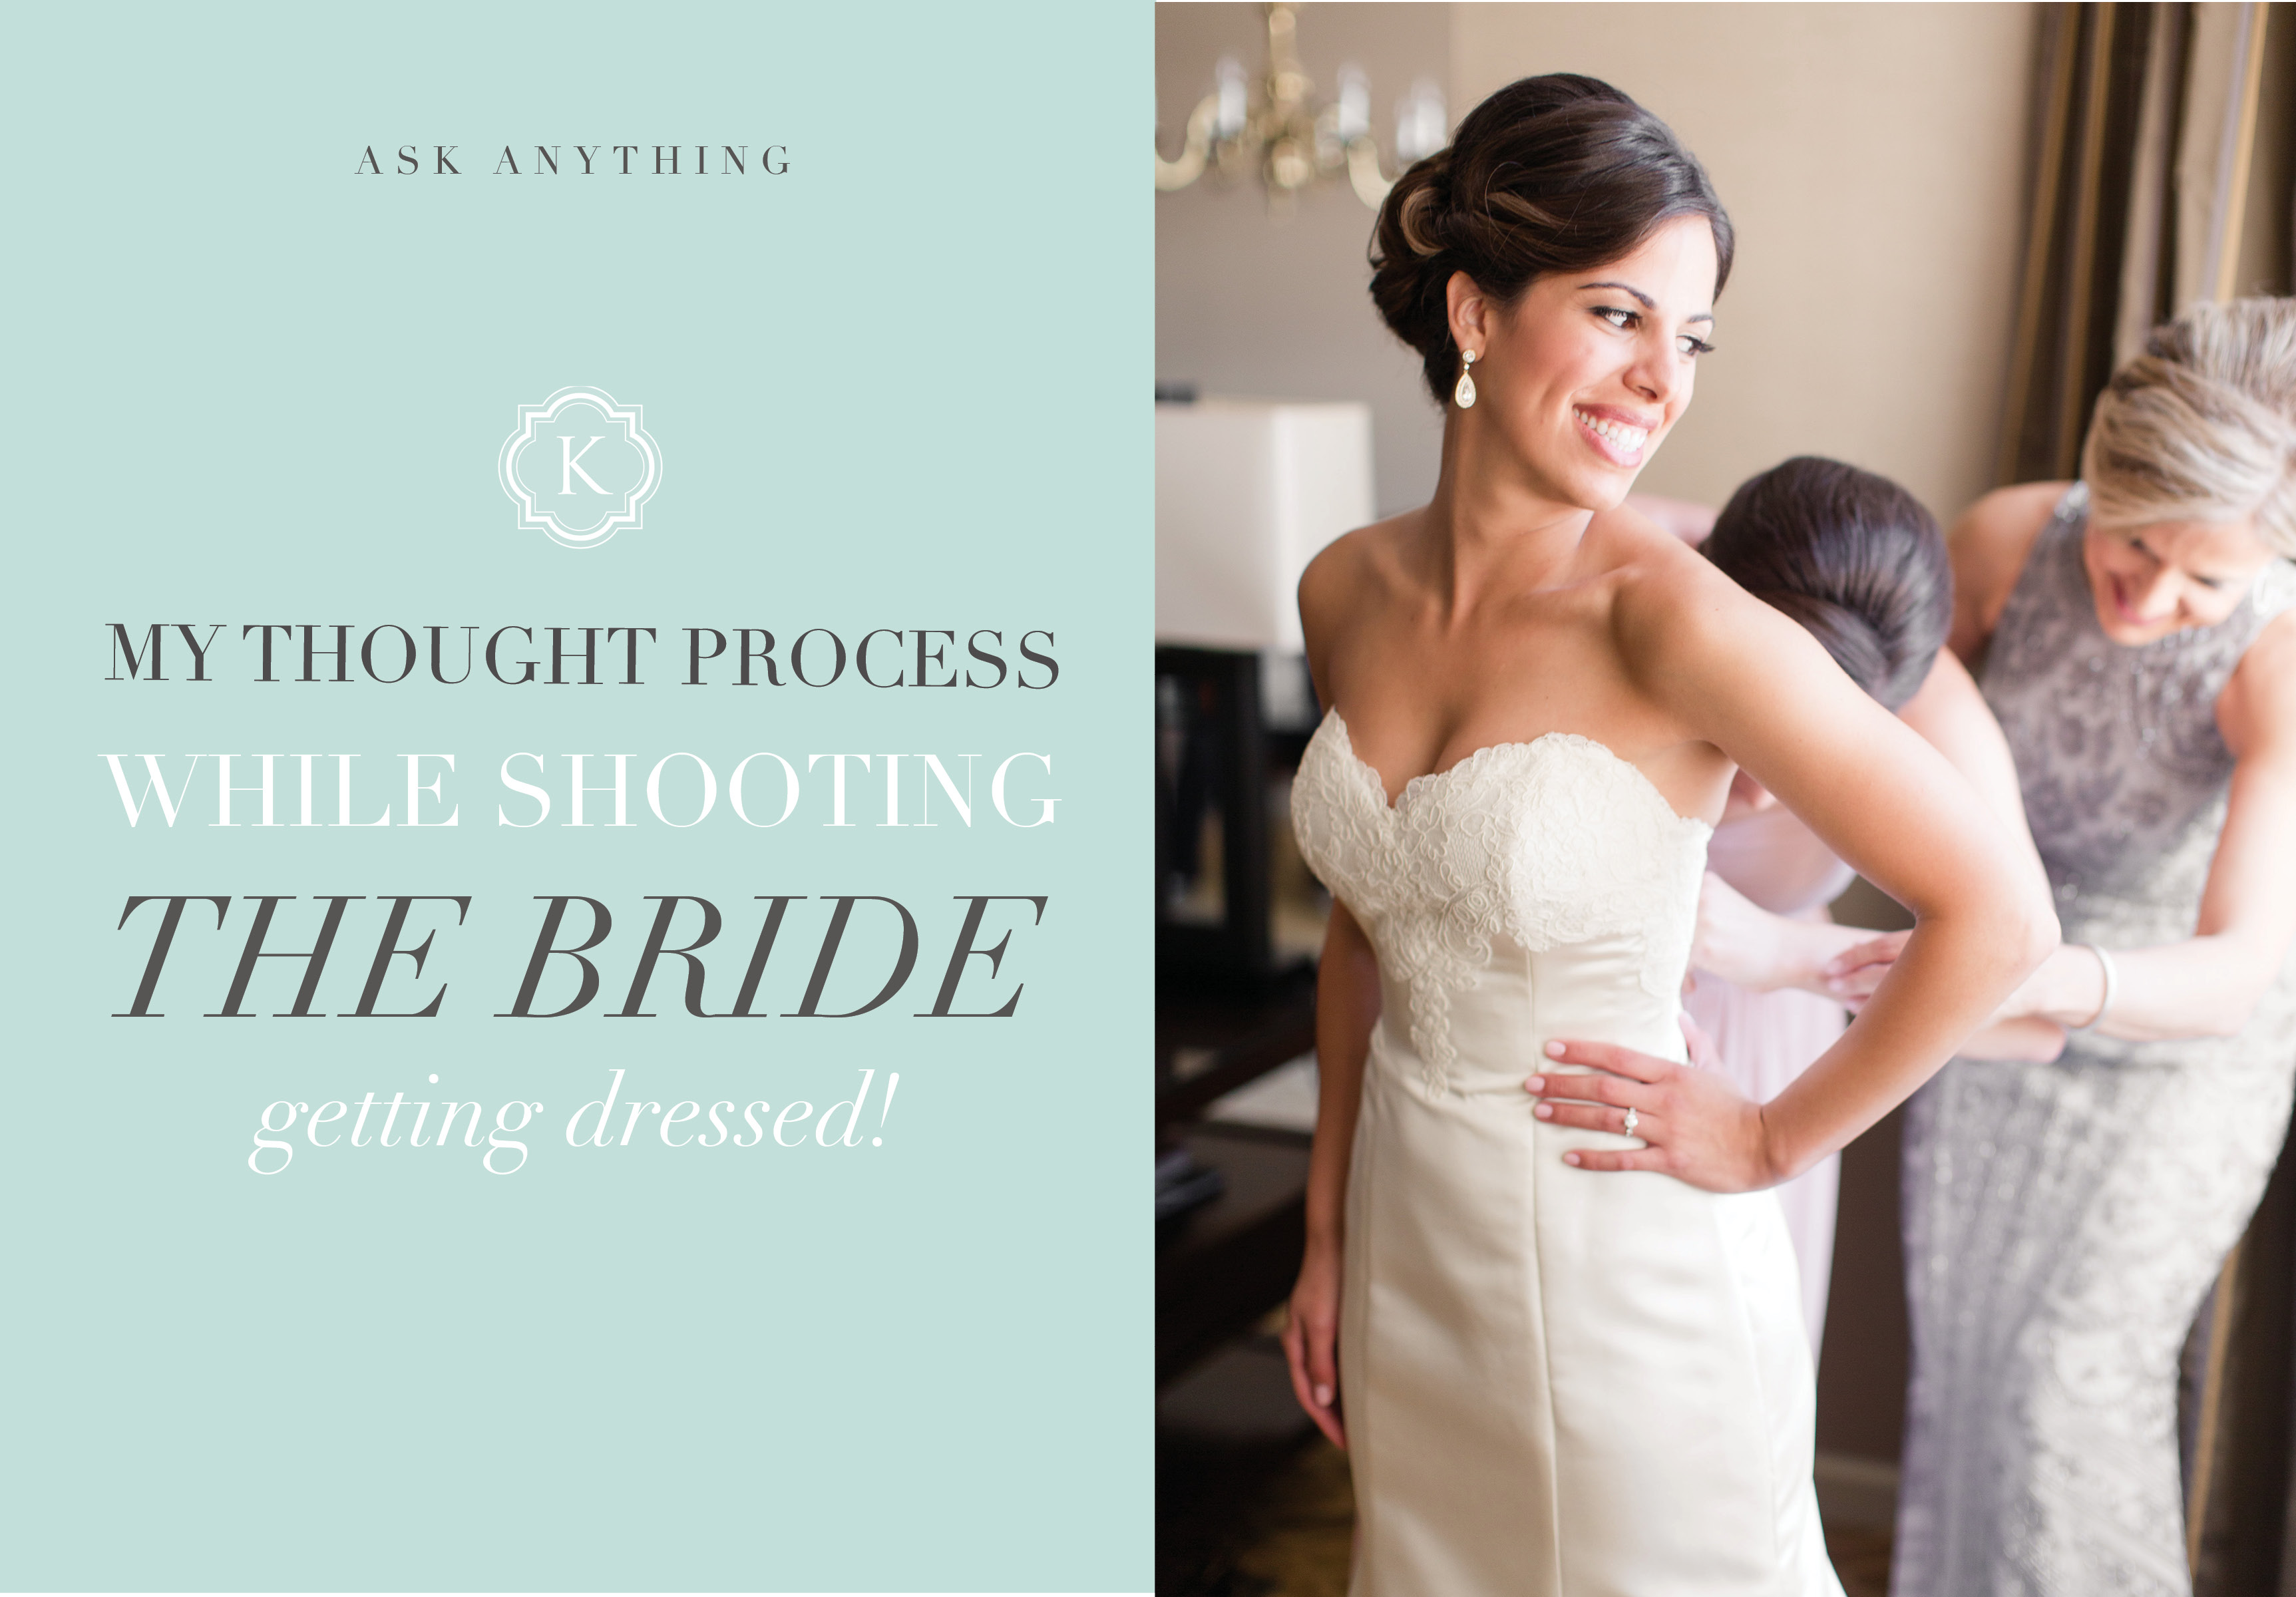
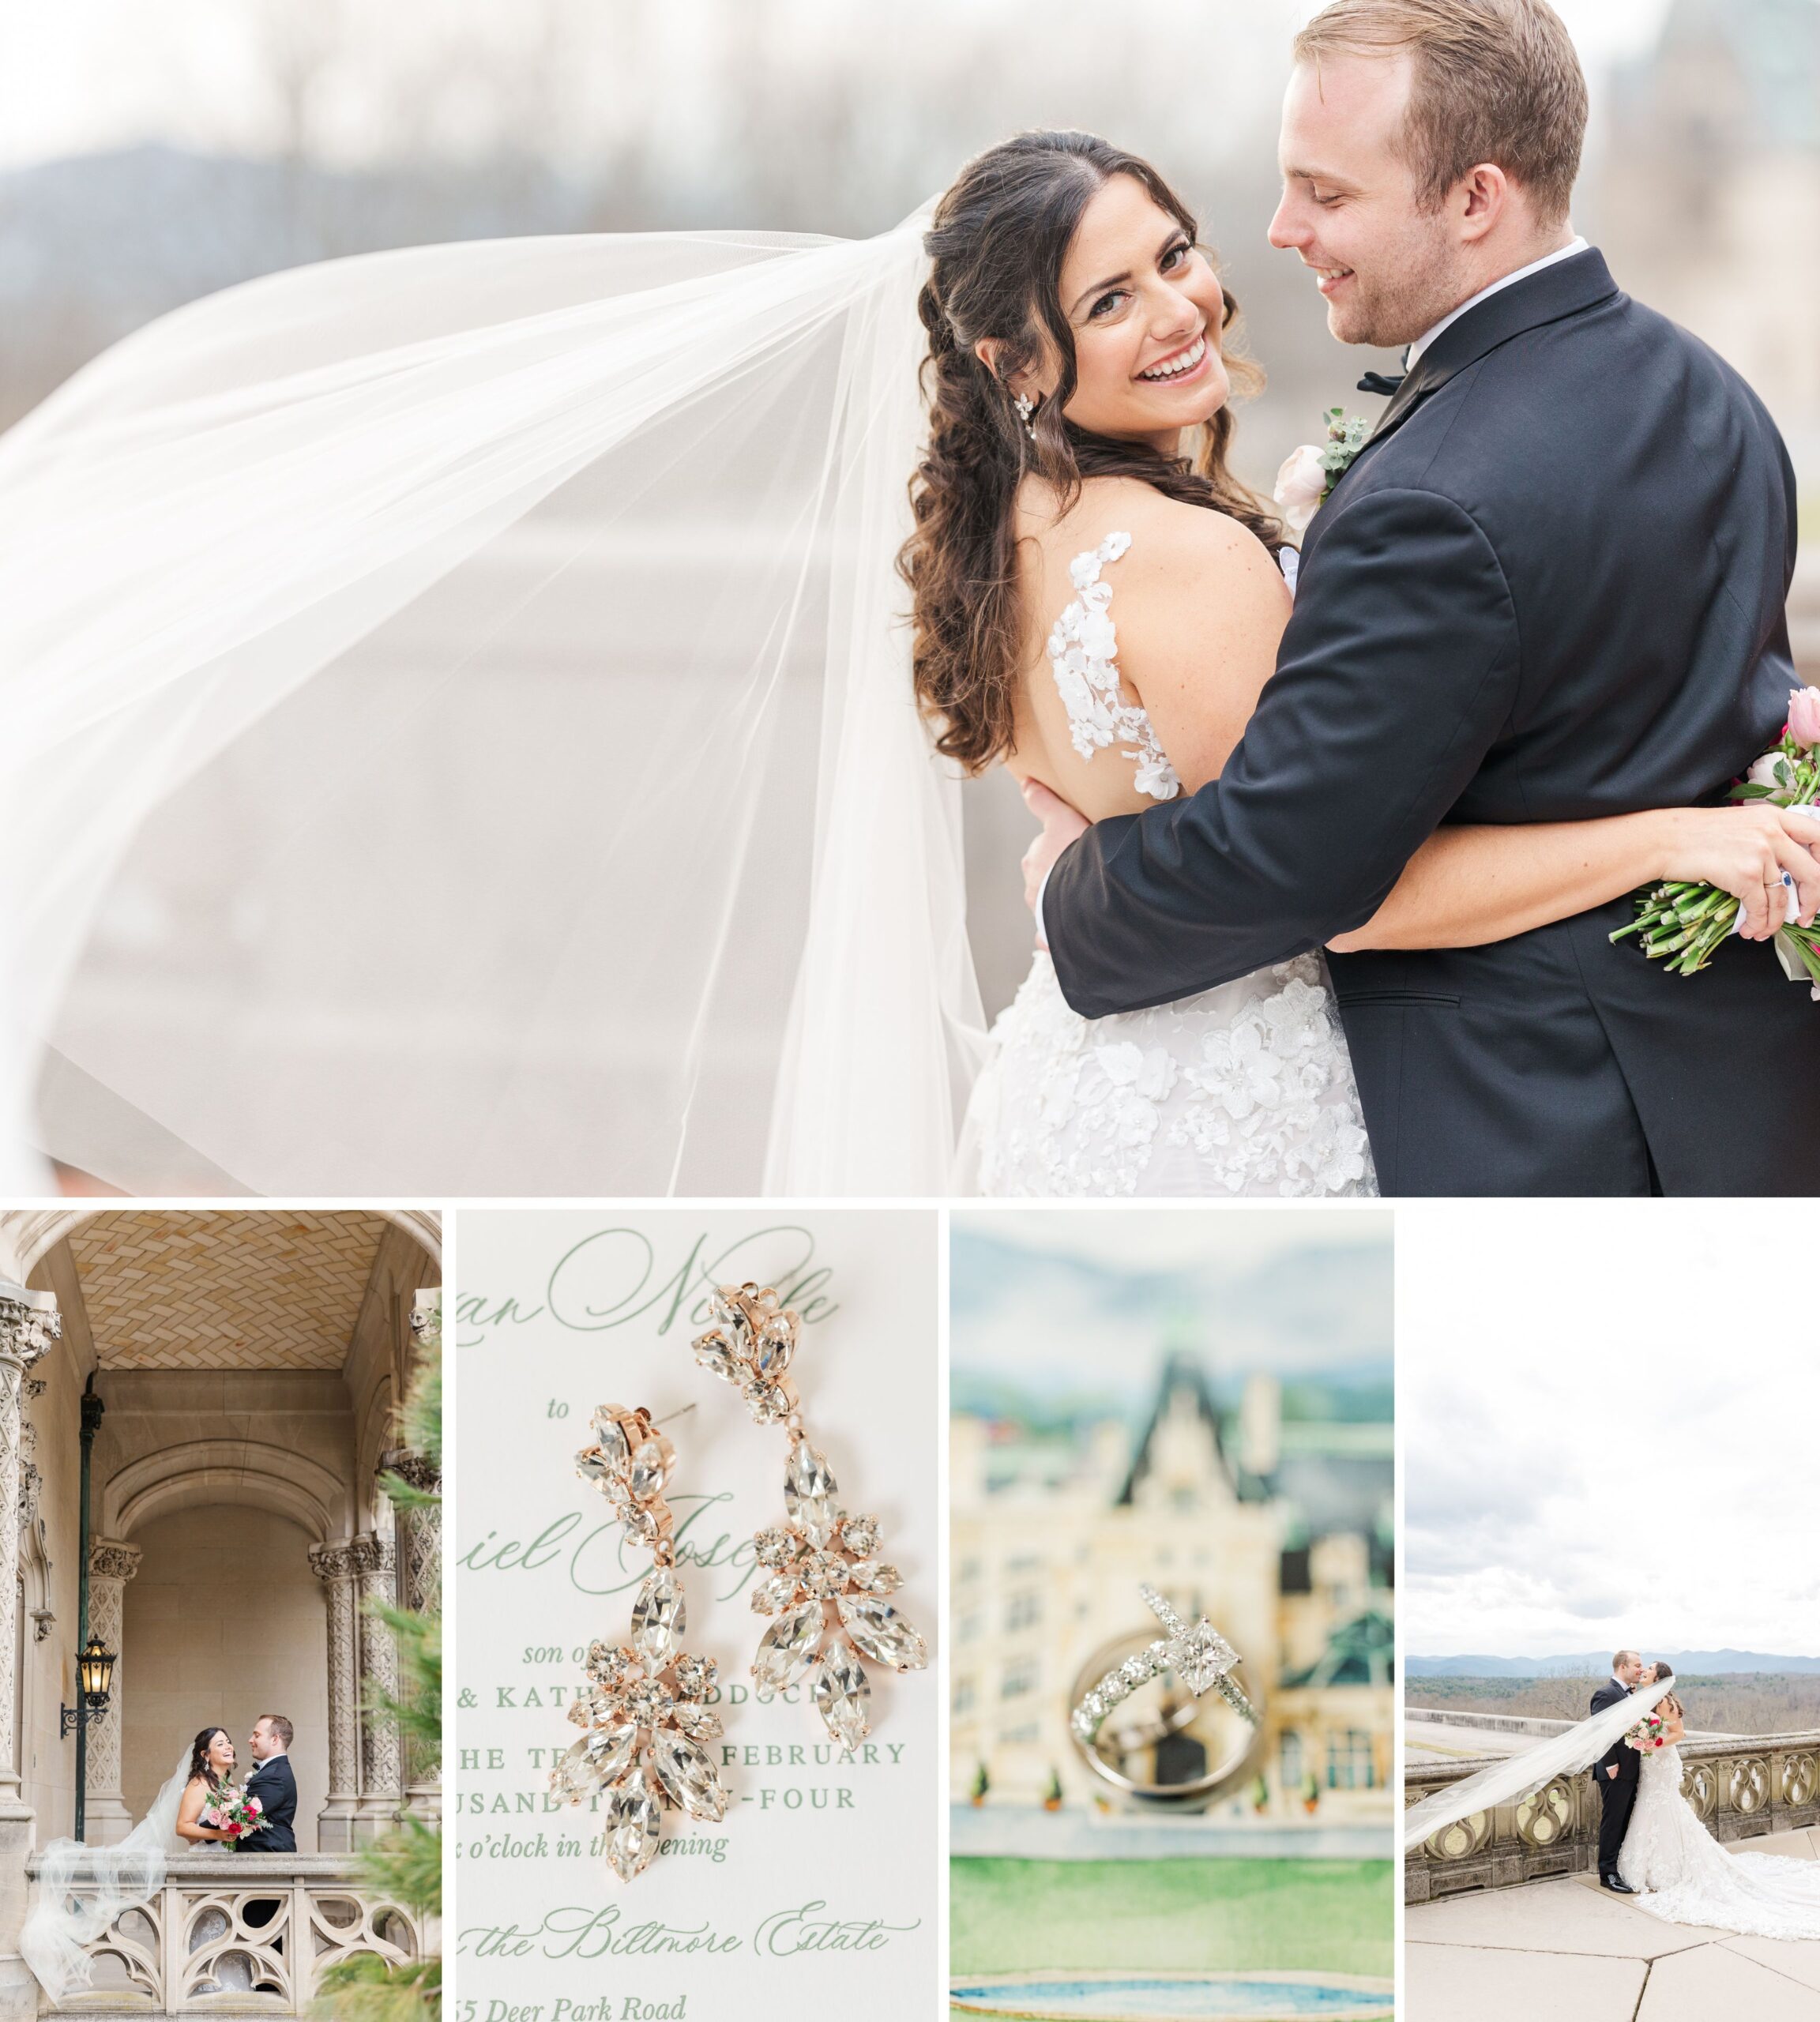
Today’s post is focused specifically on when the bride gets into her dress! When the bride is getting into her dress, I’m looking for a few very important things:
– I need access to natural light and it needs to be full length if at all possible. This means that I don’t want to use one small window that is up really high because only the bride’s upper torso would be properly exposed!
– I’m looking for a clean, neutral space without any distractions in the background! This sometimes means asking the bridal party to clear the clutter in one part of the getting ready space!
– I need mom AND bridesmaids to be dressed. I usually ask them to start getting dressed about 20 minutes prior to the bride getting into her gown!
So, once I have those things and the girls are changed and ready… now it’s time to process through all of the “must-have” shots that I want and need to capture.
In my head, this is what I was thinking when the bride was getting into her dress this past weekend…. and I’m actually going to write it like I processed it internally so that it really does show you how I work and achieve my end result :
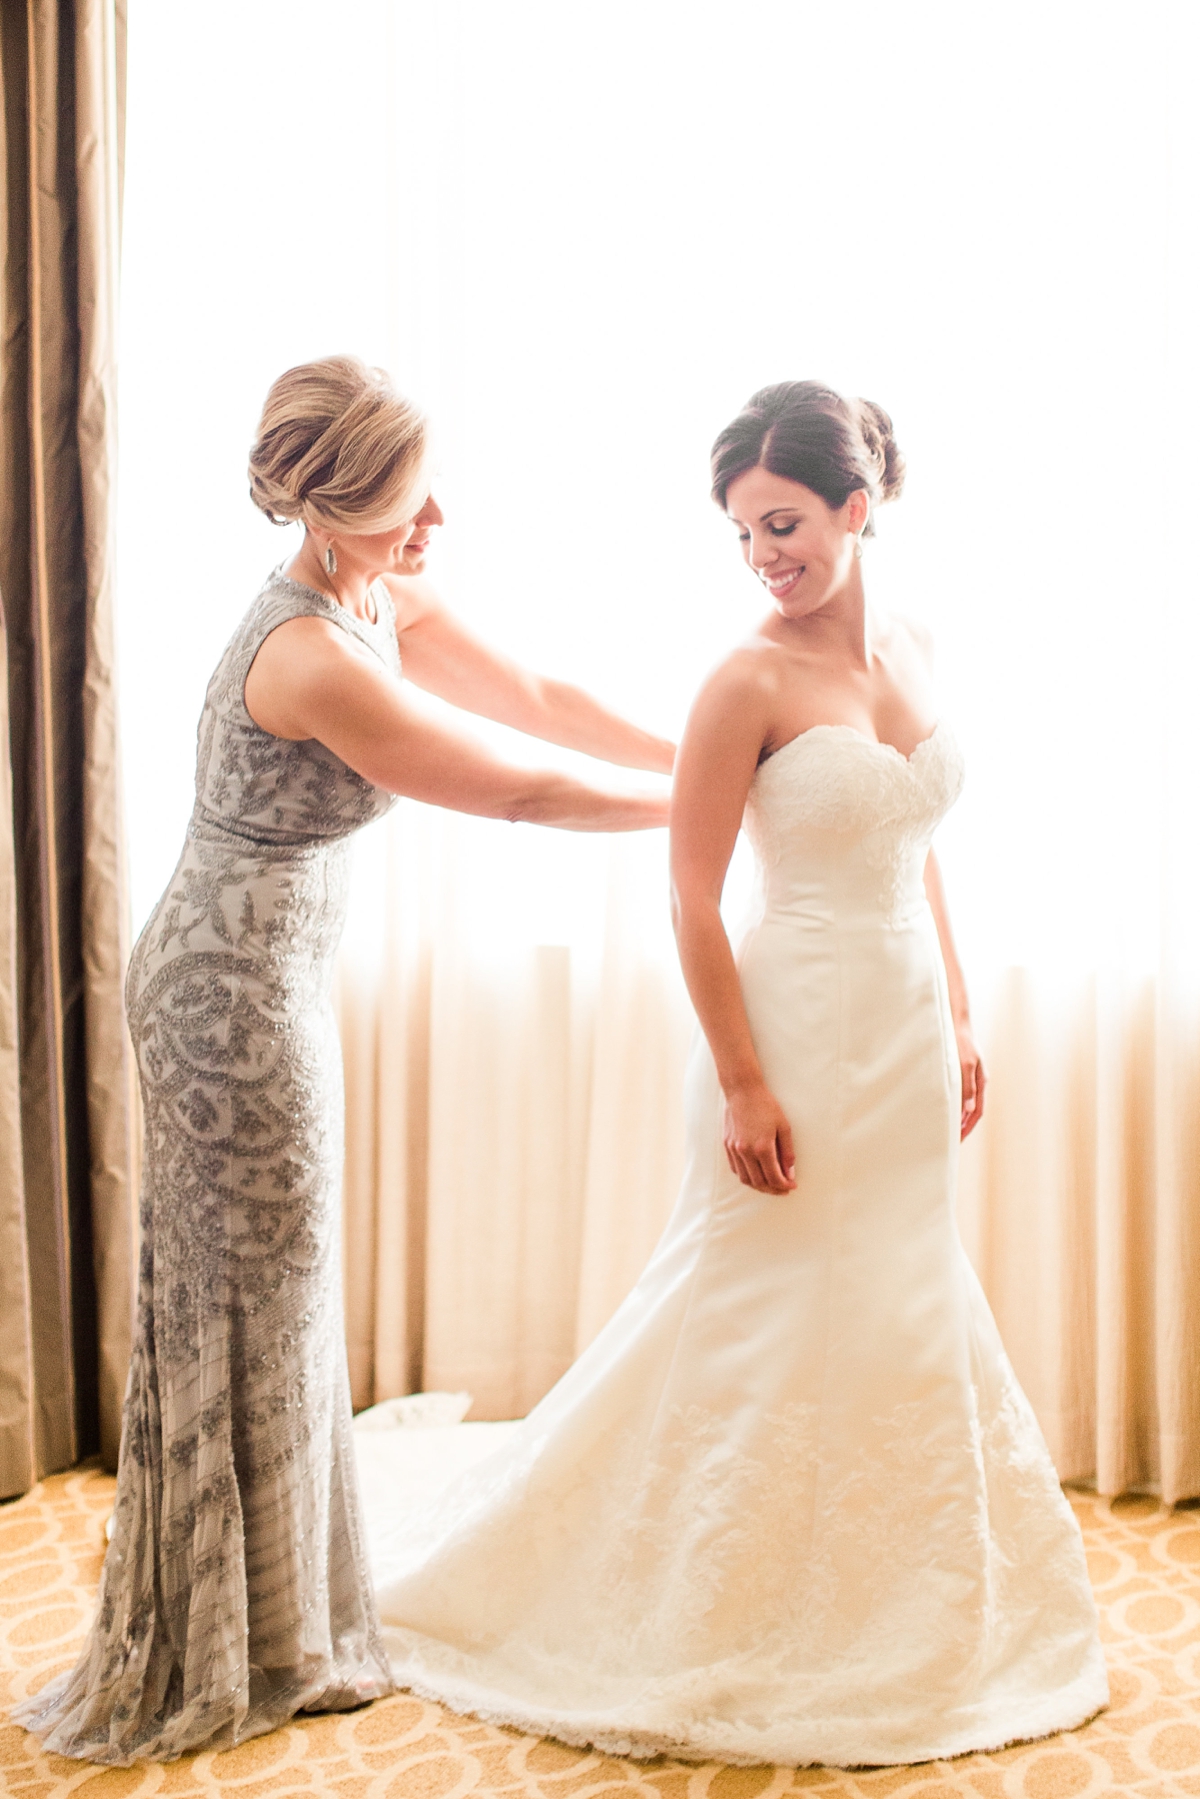
– Soooo… she’s going to get dressed over near the large windows but I’ll have to over-expose the background and there is no reflective light inside the room to brighten the front of her and so I don’t want to take ALL of her “getting in the dress” portraits with such a strong back light in case it’s TOO strong and they don’t turn out. So I’ll just do a few completely backlit and then I’ll start shooting from a side angle to have some of that window light exposing the sides of their faces. I also might decide to pull the sheer hotel curtains out to SOFTEN the window light and that helped because once I scooted over to shoot from the second angle with the direct window light hitting her face, it was too harsh! Those sheer curtains softened the light perfectly!
– Next, I’m thinking about vertical and horizontal…. I always need some vertical shots of the “getting in the dress” process for blogging purposes. These vertical shots show the whole dress and once I take that vertical shot, I scoot in close for another vertical shot that is tighter. (I do this because I’m thinking of the blog post! I also want to capture one of two gorgeous horizontal shots of this part of the day too! Horizontal shots will break up the blog post AND give my couple get options for their album design!)


– After the bride is zipped, buttoned or laced into her dress, then I have a whole new list of things that I want to capture. I work hard to capture some vertical shots of JUST the bride acting like she’s putting her earrings in. I usually use my 85mm for these shots so that it’s focused just on the bride and it’s extra creamy and soft! 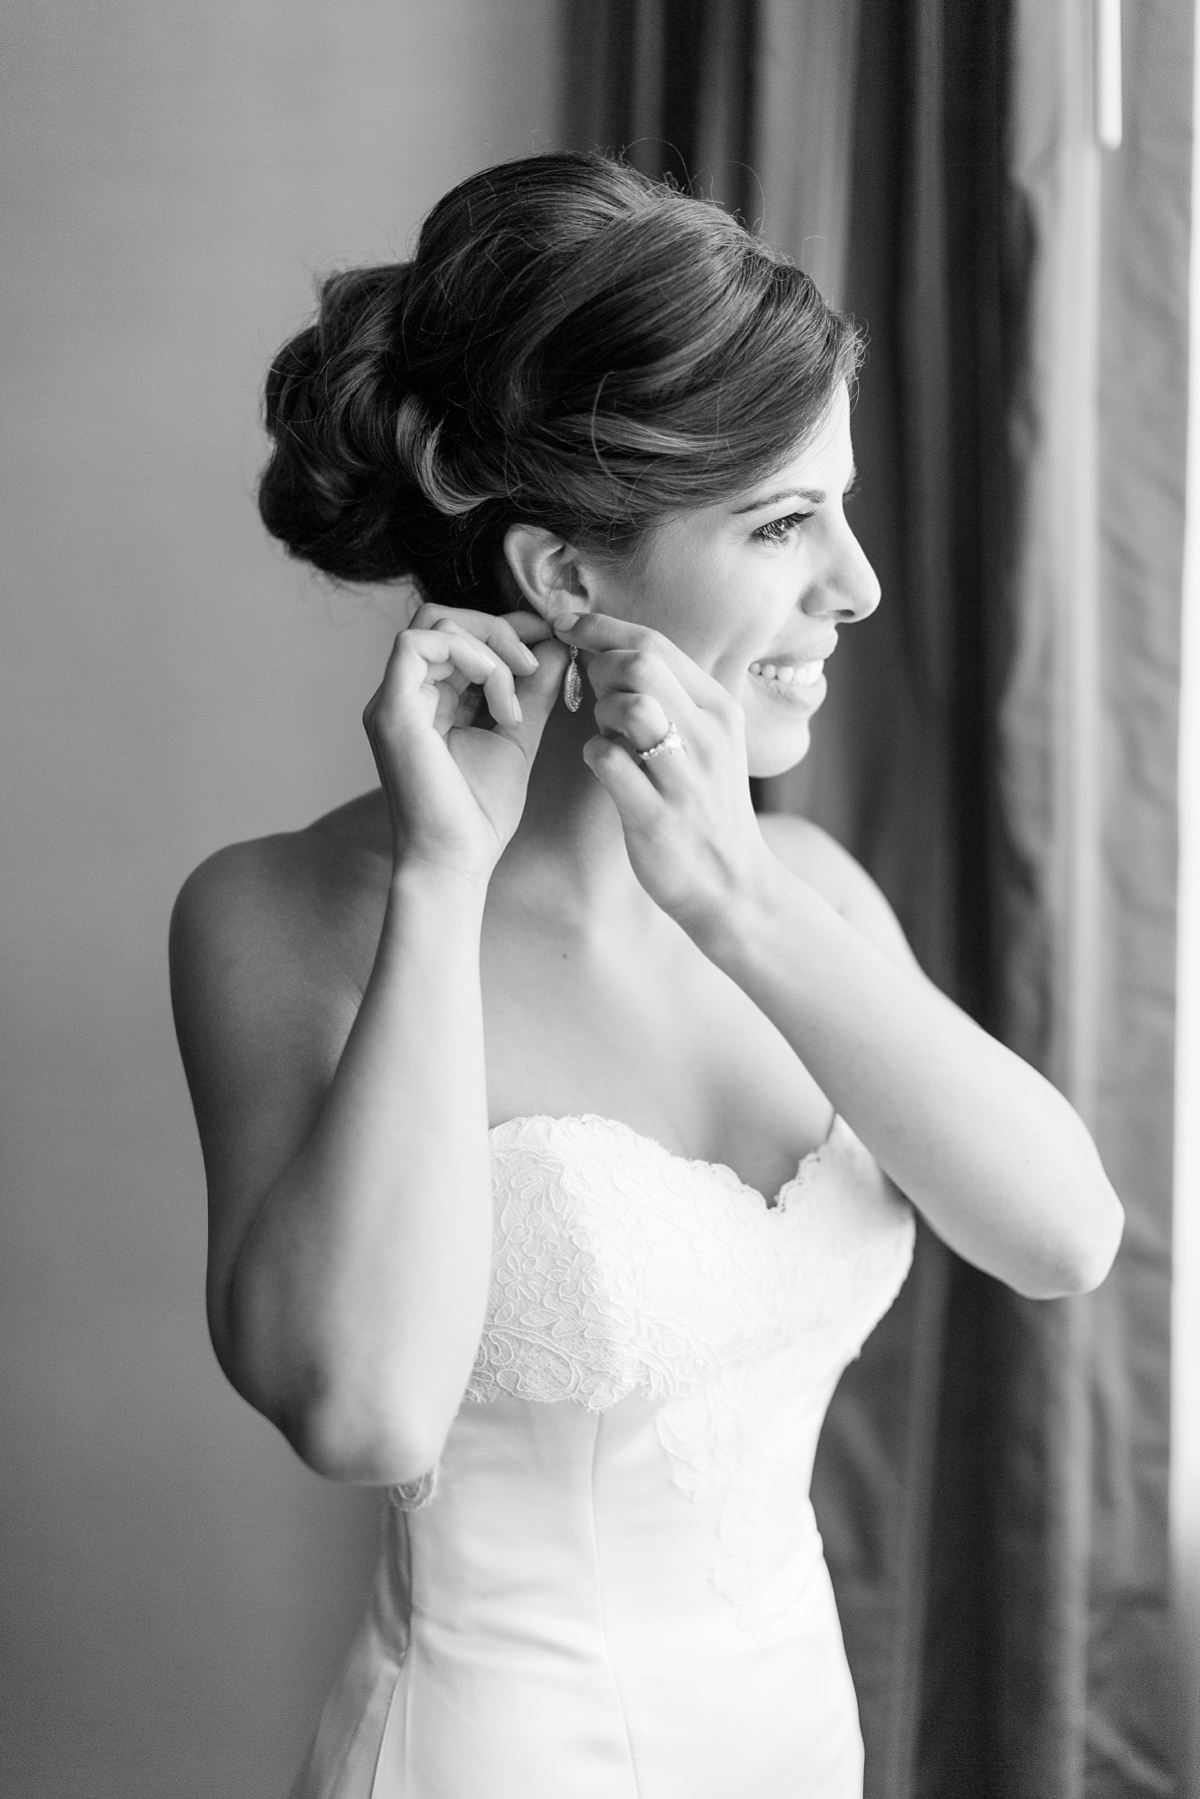
– Now is the time when I get to be creative because I’ve gotten my “must have” shots. In this specific situation the bride only had her mom help her get into the dress because of time constraints and she also needed to have her veil put in!! So, instead of photographing the veil being put in from the same angle as the shots I had taken before, I rotated to the other side of the room and tried shooting from that angle and I loved it even more than the first shots! And once I realized that I loved that angle more, I stages a few shots of the bride and her mom!!


So before I go I should probably share that EVERY wedding is different and this is just ONE example to learn from!!! I hope that it was helpful walking through my thought process during this 10 min span of the wedding day!!! If you like hearing my thought process and my approach to certain parts of the day, let me know and I’ll keep doing them!! 😃
View Other Ask Anything Posts, HERE!
Our LAST Ask Anything Post Was: The Urgency Workflow
View This ENTIRE Wedding HERE!


Thanks for reading!
— Katelyn


MORE RECENT POSTS

Kelly is an incredible wedding photographer who has been shooting 90 weddings a year. I know, it sounds unbelievable, but it’s true! Kelly’s success and the volume of work she handles is truly impressive.
Your sessions should be working FOR you not against you!

Shooting in manual mode might seem complex and overwhelming at first but there is an easier way!

Welcome to your Lightroom Classic Starter Guide video!
I’m breaking down the MUST-HAVE ITEMS that every photographer needs to be successful at the start of their career!

Oh where do I begin? This wasn’t just another wedding for me. This was a legacy KJ Wedding and I have been looking forward to it ever since my first email from Danny and Megan!
Top Personal Posts


Have a little time to read?


"Best money I have EVER spent on education! ... and I've spent a lot!”

"I love all the lessons I'm learning from KJ All Access! Thanks Katelyn!”

"I find very few educational resources worth it ... this one is!”


"Being able to see behind-the-scenes of Katelyn interacting with her clients has been SO impactful!”

"SO worth it! It's amazing the amount of knowledge you get out of them!”

"I learned just as much in one All Access as I did in a whole course! SO GOOD!"

The KJ blog
must-reads


YOUTUBE

")


")
