In my last post I explained my journey from actions to Lightroom. Basically, I learned very early on that my images looked SO much better when I exposed properly in-camera rather than “sprucing” them up later with an action or two! Today, I’m going to share a few tips about Lightroom that have really helped me speed up my editing time and develop my style. Once you find what adjustments help you create your style, your editing time will become lightening fast!! It’s wonderful! The trick is, you have to be consistent. If you’re doing some clean edits and then throwing a sepia tone on a few and you’re adding a VSCO preset on a few as well, that’s VERY confusing to your viewer. If you’re trying to find your “style”, you have to find what you love, stick with it exclusively and master it!! If I could type that last line in all caps without seeming like I was yelling at everyone, I would. It’s THAT important!!
So here are some basic Lightroom tips that have helped me tremendously over the last 6 years! Remember, the purpose of this post isn’t to make EVERYONE edit like Katelyn. The goal of this post is to educate photographers on how LR can help them find their own personal style through a deeper understanding of the program!! Enjoy!
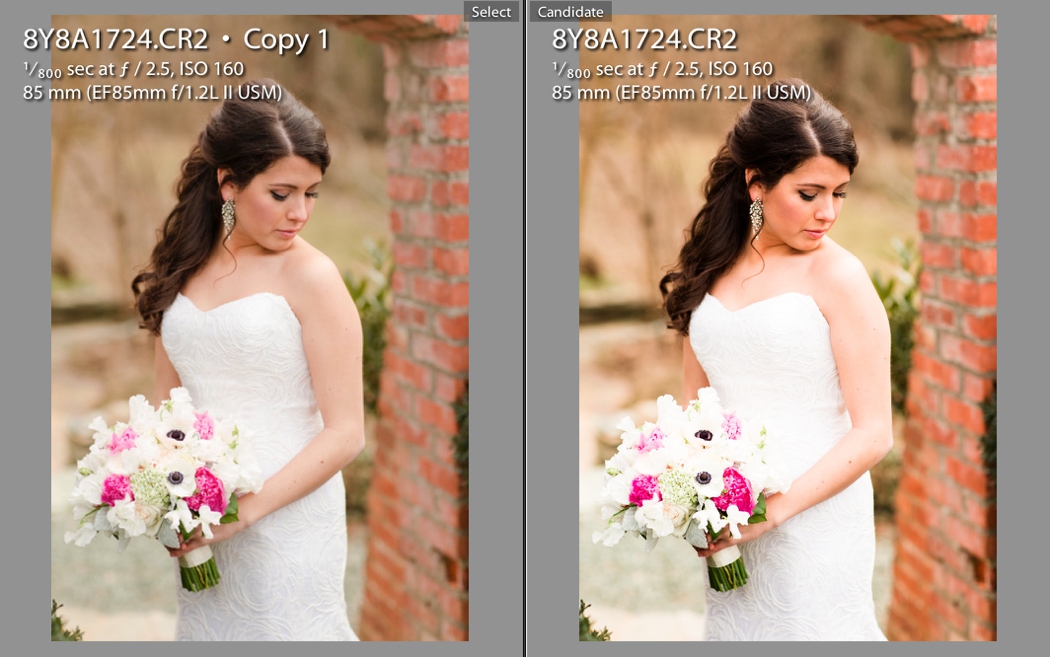
1. It doesn’t take much. What I mean by this is, don’t “overdo” it!! I consider an image “over edited” if you can’t see the details of the darkest parts of the image or the brightest parts of the image. For example, look at this image below. The image on the right is over edited. The highlights are so bright that you can’t see detail anymore and the shadows are so heavy that you can’t see details in her hair. Her hair just becomes a dark clump of pixels…. and that’s not good! You should be able to see the detail of the strands of hair! The image on the left is a more accurate edit.
2. Pay attention to how every slider in Lightroom affects an image. It takes time and practice to really master this but this is the type of knowledge that will save you so much time in post processing!! Look at the example below! I darkened the “DARKS” on the top image. On the lower image, I darkened the “SHADOWS”. These dials affect totally different areas in the image. It’s important to realize this! I choose to edit by darkening the “Shadows” because it’s a much lighter edit that still “pops” without loosing detail in the dark areas of the image. That “Tonal Curve” will become your BEST friend!

3. Learn to understand what you’re trying to accomplish in each image. In the image below, I knew that I needed to brighten their faces and so I did that by lightening the “Fill Light” (Which is also called “Shadows” on the BASIC module). After I brightened the shadows, I had to make the image “POP” by adjusting contrast, shadows on the tonal curve and lightening the darks. This is my standard edit! I do different variations of this edit over and over again. Over time, I have started to “master” these sliders!!! It makes my editing time so much simpler!! Be sure to take a look at the sliders below. They are showing my edits for the image on the right!
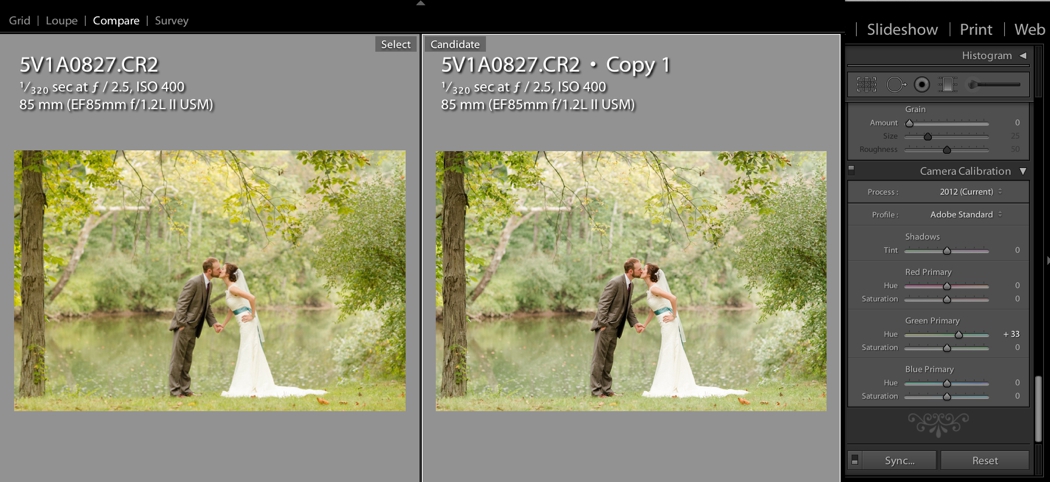
 4. Last but not least, here is one final tip! If your image has a yellow “tinge” to it, scroll on down the “Camera Calibration” and adjust the green primary just a bit! This is a great example of why knowing what EVERY slider does is helpful! By sliding the “green” slider under “Camera Calibration” to the right, you will be removing the intensity of the “Yellows” in your image. Don’t slide it too far because you will lose ALL of your yellow. This is a slider that helps a lot of photographers accomplish more of a “film” look. I don’t mute my images as much as film photographers but I do love this little trick! The image on the right has had its’ Green Primary adjusted! See the difference?